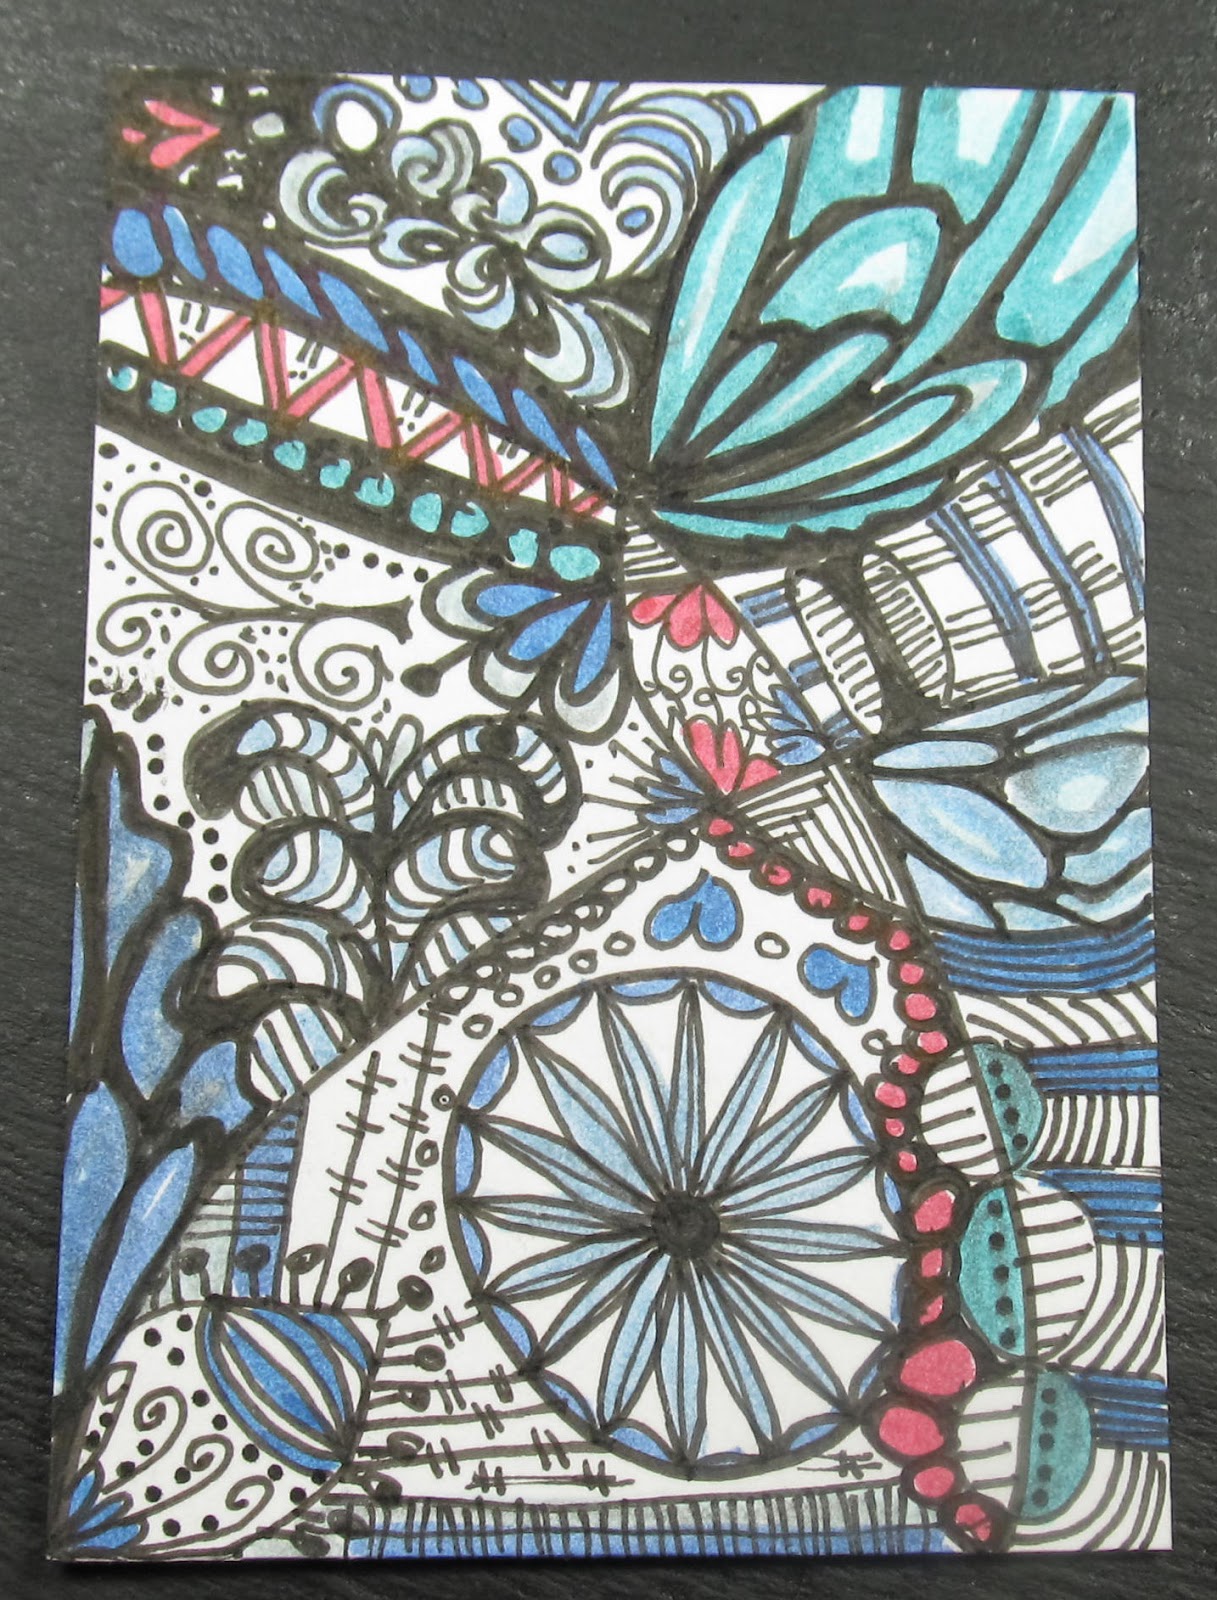
Week 3 of my doodle a day challenge and it seems to be going well. I am feeling pretty positive and think I am going to be able to keep the momentum up...or at least to be able to create 7 doodles over the course of a week. I am wondering if I build great habits and keep it up for a year....
This weeks doodles include sketch pad size zentangles, ATC size zantangles and my first dabbles with watercolour paints.
01/08/2016
26/07/2016
Knitting inchies for a patchwork dolly blanket
The idea for this project was suggested to me by my good friend Sue. I am going to be teaching my daughter and a small group of her friends the basics of knitting over the summer holidays.
Below are some ideas and patterns to make little inch long patchwork pieces that can be stitched together to make a sweet dolly blanket.
Cast on 10 stitches
Knit 14 rows
Cast off
Cast on 10 stitches
1. Knit 10 stitches
2. Pearl 10 stitches
Repeat 1 and 2 5 more times (12 rows total)
Cast off
Cast on 10 stitches
1. Knit 2. Pearl 2, Knit 2, Pearl 2, Knit 2
Repeat Row 1 13 more times (14 rows total)
Cast on 10 stitches
1. Knit 2. Pearl 2, Knit 2, Pearl 2, Knit 2
2. Pearl 2, Knit 2, Pearl 2, Knit 2, Pearl 2
Repeat Row 1 and 2 5 more times (14 rows total)
Cast on 10 stitches
1. Knit 10 stitches
2. Knit 2, pearl 6, Knit 2
Repeat 1 and 2 6 more times
13. Knit 10 stitches (15 rows)
Cast off
Cast on 10 stitches
Knit 3 rows
4. Knit next row but wrap yarn around the needle twice.
5. Knit first stitch of every pair but slide both wraps off the needle
Knit 3 rows
9. Knit next row but wrap yarn around the needle twice.
10. Knit first stitch of every pair but slide both wraps off the needle
Knit 3 rows (13 rows total)
Cast off
Cast on 10 stitches
1. Knit 10 stitches
2. (Knit 1, Yarn to front, Knit 2 together) repeat 3 times, Knit 1
3. Knit 10 stitches
4. Knit 10 stitches
Repeat rows 2, 3 and 4 3 more times
14. Knit 10 stitches (14 rows)
Cast off.
Below are some ideas and patterns to make little inch long patchwork pieces that can be stitched together to make a sweet dolly blanket.
Cast on 10 stitches
Knit 14 rows
Cast off
Cast on 10 stitches
1. Knit 10 stitches
2. Pearl 10 stitches
Repeat 1 and 2 5 more times (12 rows total)
Cast off
Cast on 10 stitches
1. Knit 2. Pearl 2, Knit 2, Pearl 2, Knit 2
Repeat Row 1 13 more times (14 rows total)
Cast on 10 stitches
1. Knit 2. Pearl 2, Knit 2, Pearl 2, Knit 2
2. Pearl 2, Knit 2, Pearl 2, Knit 2, Pearl 2
Repeat Row 1 and 2 5 more times (14 rows total)
Cast on 10 stitches
1. Knit 10 stitches
2. Knit 2, pearl 6, Knit 2
Repeat 1 and 2 6 more times
13. Knit 10 stitches (15 rows)
Cast off
Cast on 10 stitches
Knit 3 rows
4. Knit next row but wrap yarn around the needle twice.
5. Knit first stitch of every pair but slide both wraps off the needle
Knit 3 rows
9. Knit next row but wrap yarn around the needle twice.
10. Knit first stitch of every pair but slide both wraps off the needle
Knit 3 rows (13 rows total)
Cast off
Cast on 10 stitches
1. Knit 10 stitches
2. (Knit 1, Yarn to front, Knit 2 together) repeat 3 times, Knit 1
3. Knit 10 stitches
4. Knit 10 stitches
Repeat rows 2, 3 and 4 3 more times
14. Knit 10 stitches (14 rows)
Cast off.
Labels:
Beginner knitting,
crafts for kids,
dolly blanket,
inchies,
kids stuff,
knitting
24/07/2016
Doodle a day challenge week 2
So far so good on my doodle a day challenge, here are this weeks offerings :) The Zentangle-esque pic second from last was the work of two days, the first in black and the second in colour. That one has become my first ever ACEO's over on Etsy www.etsy.com/uk/shop/KitzbitzArtGlass
Jolene xx
Jolene xx
Labels:
aceo,
butterfly,
doodle a day challenge,
flowers,
zentangle
18/07/2016
Doodle a day Challenge week 1
I'm starting a new chapter, this week I have moved my studio back home to a fab new space at the bottom of the garden. I have not been on a torch in what feels like forever what with all the packing and unpacking and am missing it so much. I get to light the torch for the first time in a week tonight, can't wait!
As part of my new routine I have decided to get out of my comfort zone and start a doodle a day challenge.
This is week 1....
Jolene x
www.kitzbitz.etsy.com
As part of my new routine I have decided to get out of my comfort zone and start a doodle a day challenge.
This is week 1....
Jolene x
www.kitzbitz.etsy.com
Labels:
butterfly,
doodle a day challenge
01/04/2016
Messy Testing - Meadow and Byzantium ltd run
I have just two more colours to show and tell from the spring 2016 collection of new colours from Creation is Messy. On the left are beads made on a base of CiM Meadow ltd run. Meadow is a rich striated mid green. I have teamed it up here with CiM Aegean dots and tumbled encase Aegean donuts.
The last new colour is called Byzantium ltd Run. It is super lovely, a deep rich purple semi transparent milky opal moonstone. The bright orange stripe is made with CiM Butternut ltd run.
Jolene x
The last new colour is called Byzantium ltd Run. It is super lovely, a deep rich purple semi transparent milky opal moonstone. The bright orange stripe is made with CiM Butternut ltd run.
Jolene x
Labels:
Byzantium ltd run,
Meadow ltd run,
Messy testing
Tiny Jemima, knitted charity bear tutorial for a complete beginner
I have been learning to knit since the start of this year. My Local WI group launched a community project called Trauma Teddies. The aim is to provide to provide the Metropolitan Police in Hillingdon the means to pacify a child in a traumatic situation through donations of handmade toys and teddies. The project struck a chord with me and I decided to learn to knit so that I could get involved and donate some teddies myself.
I started out my kitting journey by following this simple charity bear pattern by Patricia Smith. I found that the weight of the first leg on my needle really off putting when knitting the second and also found the first full row of garter stitch that joins the legs together was really tricky.
My children requested bears with clothes on so I looked about on the web and found these adorable bear and clothes tutorials by Baldy Sheep on Etsy. It is now many hours of knitting fun later and I have learnt a whole lot of useful info about pretty combinations of pearl and knit stitch from the Baldy Sheep tutorials. I also found that kitting a teddy in two parts and stuffing from the head was much easier for a total beginner like me. While knitting teddy bear T shirts it dawned on me that if I could use the same technique to knit a bear from the head down to the toes it would eliminate all of the bits I found tricky with the first charity bear tutorial.
I decided to give knitting a bear from the head downwards a go. I based my pattern proportions loosely on a scaled down version of the Patrica Smith bear. The aim was to find a super simple way to be able to knit, sew and stuff a small bear from start to finish in just a couple of hours. Jemima is very sweet, she comes out at just 4 inches high when knitted on 4mm needles with DK wool.
Jemima Pattern
Head
Cast on 12 sts
Knit 12 rows
Knit 2 together, knit 8 st, knit 2 together (10 sts)
Knit 2 together, knit 6 st, knit 2 together (8 sts)
Arms
Cast on 10 sts at the start of the next two rows (28 sts)
Knit 6 rows
Cast of 8 sts at the start of the next 2 rows (12 sts)
Body
Knit 12 rows
Legs
Knit 6 sts, turn your work
Knit 11 more rows of 6sts
Cast off
Rejoin your wool and knit 12 rows of the remaining 6 sts
Cast off
Repeat pattern again in a bright contrasting colour for the back of the Teddy
Eyes, nose and mouth
You can either do this first before stitching the front and back together or after your bear has been stitched and stuffed. Use Bullion stitch to make a bulky oval nose. Embroider on two small eyes and a mouth and secure all of the ends securely and neatly (I find it easier to embroider the face before sewing together so I can hide knots and weave wool ends in on the wrong side of the knitting).
Sewing and stuffing
Weave all loose ends in the wrong side of the knitting. Place right sides of the bear together and starting at one side of the head, oversew around the edges of the whole bear leaving a couple of cm gap at the top head. Carefully turn your bear right side out and stuff with soft toy stuffing (available in all good craft shops). Carefully sew the small opening in the head closed.
Ears
Separate a small diagonal area on the top corner on each side of the head using running stitch. Sew over the running stitch line two or three times, secure running stitch with a couple of small stitches hidden in the seam. Hide the tail end of the wool inside your stuffed bear. Gently pull the ears to a more rounded shape.
Useful links.....
How to cast on : Long Tail Method by Knittinghelp.com
How to knit the Garter Stritch by PurlPlanet
How to knit: Casting off for beginners by tinselmint
Knitting Help: Weaving in ends in Garter stitch by VeryPink Knits
Bullion knots by Mary Corbet
Finishing : Oversewing by Stylecraft Yarns
Face Embroidery on Knitted Toys by SusanBAnderson
Please do not sell bears made from this tutorial unless the are for charitable purposes.
Happy Knitting, Jolene x
I started out my kitting journey by following this simple charity bear pattern by Patricia Smith. I found that the weight of the first leg on my needle really off putting when knitting the second and also found the first full row of garter stitch that joins the legs together was really tricky.
My children requested bears with clothes on so I looked about on the web and found these adorable bear and clothes tutorials by Baldy Sheep on Etsy. It is now many hours of knitting fun later and I have learnt a whole lot of useful info about pretty combinations of pearl and knit stitch from the Baldy Sheep tutorials. I also found that kitting a teddy in two parts and stuffing from the head was much easier for a total beginner like me. While knitting teddy bear T shirts it dawned on me that if I could use the same technique to knit a bear from the head down to the toes it would eliminate all of the bits I found tricky with the first charity bear tutorial.
I decided to give knitting a bear from the head downwards a go. I based my pattern proportions loosely on a scaled down version of the Patrica Smith bear. The aim was to find a super simple way to be able to knit, sew and stuff a small bear from start to finish in just a couple of hours. Jemima is very sweet, she comes out at just 4 inches high when knitted on 4mm needles with DK wool.
Jemima Pattern
Head
Cast on 12 sts
Knit 12 rows
Knit 2 together, knit 8 st, knit 2 together (10 sts)
Knit 2 together, knit 6 st, knit 2 together (8 sts)
Arms
Cast on 10 sts at the start of the next two rows (28 sts)
Knit 6 rows
Cast of 8 sts at the start of the next 2 rows (12 sts)
Body
Knit 12 rows
Legs
Knit 6 sts, turn your work
Knit 11 more rows of 6sts
Cast off
Rejoin your wool and knit 12 rows of the remaining 6 sts
Cast off
Repeat pattern again in a bright contrasting colour for the back of the Teddy
Eyes, nose and mouth
You can either do this first before stitching the front and back together or after your bear has been stitched and stuffed. Use Bullion stitch to make a bulky oval nose. Embroider on two small eyes and a mouth and secure all of the ends securely and neatly (I find it easier to embroider the face before sewing together so I can hide knots and weave wool ends in on the wrong side of the knitting).
Sewing and stuffing
Weave all loose ends in the wrong side of the knitting. Place right sides of the bear together and starting at one side of the head, oversew around the edges of the whole bear leaving a couple of cm gap at the top head. Carefully turn your bear right side out and stuff with soft toy stuffing (available in all good craft shops). Carefully sew the small opening in the head closed.
Ears
Separate a small diagonal area on the top corner on each side of the head using running stitch. Sew over the running stitch line two or three times, secure running stitch with a couple of small stitches hidden in the seam. Hide the tail end of the wool inside your stuffed bear. Gently pull the ears to a more rounded shape.
Useful links.....
How to cast on : Long Tail Method by Knittinghelp.com
How to knit the Garter Stritch by PurlPlanet
How to knit: Casting off for beginners by tinselmint
Knitting Help: Weaving in ends in Garter stitch by VeryPink Knits
Bullion knots by Mary Corbet
Finishing : Oversewing by Stylecraft Yarns
Face Embroidery on Knitted Toys by SusanBAnderson
Please do not sell bears made from this tutorial unless the are for charitable purposes.
Happy Knitting, Jolene x
09/03/2016
Messy Testing - Cleopatra ltd run
Cleopatra ltd run is a densely saturated rich purple. I have used it to make candy striped core petal beads. Every shade of transparent purple that you see in these beads has been created with Cleopatra.
I have used it as a solid colour core under clear in the tumble etched spacers. In the rounds I have used it to create the initial core with white dots on top or or over a white core as tiny dots that have been further diluted with Effetre clear and stretched out to make pale candy stripes. The petals have been formed by adding tiny dots of Cleopatra over dots of either Effetre white or CiM Lapis. On the surface of these beads I have used Cleopatra stringer to create some darker purple dotty details by adding a second layer of Cleopatra to build up the colour intensity. All in all Cleopatra is a very pretty and versatile colour.
Jolene x
I have used it as a solid colour core under clear in the tumble etched spacers. In the rounds I have used it to create the initial core with white dots on top or or over a white core as tiny dots that have been further diluted with Effetre clear and stretched out to make pale candy stripes. The petals have been formed by adding tiny dots of Cleopatra over dots of either Effetre white or CiM Lapis. On the surface of these beads I have used Cleopatra stringer to create some darker purple dotty details by adding a second layer of Cleopatra to build up the colour intensity. All in all Cleopatra is a very pretty and versatile colour.
Jolene x
Labels:
Cleopatra ltd run,
Messy color,
Messy testing
Messy Testing - Toto, Pistachio Ice Cream and Slate ltd run
Today I have 3 more pretty additions to the CiM palette to show. First is Toto ltd run which starts out as kind of brownish beige but strikes to a variety of brown and earthy grey shades the longer you work it in the flame. Here you can see a good range of the colours that come from Toto. The tumble etched spacers are made with a core of Toto encased with Effetre clear. I have decorated the rounds with Pistachio Ice Cream ltd run dots under Maple with Mahogany ltd run stringer and Butternut ltd run dots.
These rounds are made with Pistachio Ice Cream ltd run which is a very pale pastel green. You could go as far as calling it a green tinted white. I have used the same combination of colours to decorate the Pistachio Ice Cream rounds, large Toto dots under Maple with Pistachio Ice Cream stringer and Butternut ltd run and Mahogany ltd run dots. The spacers are encased tumble etched Maple.
This last set are made with Slate ltd run, a pale and pretty transparent grey toned blue. Both the rounds and spacers are made with a core of Slate under Effetre Clear. The spacers have been tumble etched and the rounds decorated with large Effetre white dots under Aegean ltd run and my all time favourite green glass, Elphaba.
Jolene x
These rounds are made with Pistachio Ice Cream ltd run which is a very pale pastel green. You could go as far as calling it a green tinted white. I have used the same combination of colours to decorate the Pistachio Ice Cream rounds, large Toto dots under Maple with Pistachio Ice Cream stringer and Butternut ltd run and Mahogany ltd run dots. The spacers are encased tumble etched Maple.
This last set are made with Slate ltd run, a pale and pretty transparent grey toned blue. Both the rounds and spacers are made with a core of Slate under Effetre Clear. The spacers have been tumble etched and the rounds decorated with large Effetre white dots under Aegean ltd run and my all time favourite green glass, Elphaba.
Jolene x
08/03/2016
Messy Testing - Ecru and Allspice ltd runs
There are some lovely neutral and earthy toned opal glass colours on the horizon too within this next release of ltd run colours from CiM. I have teamed them up with classic Silvered Ivory stringer wraps.
First up I have a trio of hearts to show that are made with Ecru ltd run, a gorgeous cream opal glass with a pearly looking lustre to it. This glass is just glorious.
Allspice ltd run is a deep golden brown that makes me think of caramelised sugar.
Jolene x
First up I have a trio of hearts to show that are made with Ecru ltd run, a gorgeous cream opal glass with a pearly looking lustre to it. This glass is just glorious.
Jolene x
Labels:
Allspice ltd run,
Ecru ltd run,
Messy testing
Messy Testing - Jet Stream ltd run
Jet Stream ltd run, coming out from Creation is Messy (CiM) soon, is a pretty sapphire blue. It behaves beautifully in the flame without scumming or boiling when worked hot.
These beads on the left have a core of Jet Stream encased with Efftre clear and decorated with Butternut ltd run, Elphaba and Efftre light Grass Green.
Jet Stream also looks lovely layered up inside petal beads. It is pale and delicate when used in small quantities over Effetre white and diluted further with layers of clear encasement. The dark opaque blue details in these beads is Effetre 421 Lapis Blue. The spacers are made with a thin core of Jet Stream encased with Effetre 006 and given a tumble etched finish.
Jolene
These beads on the left have a core of Jet Stream encased with Efftre clear and decorated with Butternut ltd run, Elphaba and Efftre light Grass Green.
Jet Stream also looks lovely layered up inside petal beads. It is pale and delicate when used in small quantities over Effetre white and diluted further with layers of clear encasement. The dark opaque blue details in these beads is Effetre 421 Lapis Blue. The spacers are made with a thin core of Jet Stream encased with Effetre 006 and given a tumble etched finish.
Jolene
Labels:
Jet Stream ltd run,
Messy testing
04/03/2016
Messy Testing - African Violet ltd run
African Violet ltd run is a rich dark transparent purple. It is part of the spring 2016 collection of new colours from Creation is Messy. It is so dark that I have used it here sparingly as a thin core under a thick encasing layer of Effetre 006 clear to show the hue better. The round beads have been decorated with dots and stringers made with Lapis (opaque purple), Grumpy Bear (pale blue) and African Violet. The donut shaped spacers are also made with African Violet under 006. They have been tumble etched to give them a matt/frosted finish.
Jolene x
Jolene x
03/03/2016
Messy Testing - Ceylon ltd run
Ceylon ltd run is a very pretty dark smokey quartz colour. I have used it here as the core colour under these encased beads. The rounds have been decorated with thin stringers of Adamantium, Effetre baby pink and Rubino Ora. I just love warm grey and pink together. I have tumble etched the encased Ceylon donut spacers and they look like frosted sea glass, though it is very rare to find sea glass naturally in shades of grey.
Smokey Ceylon look wonderful with Adamantium which is a warm grey. These hearts are half Ceylon and half Adamantium separated with a twisted band of silvered ivory stringer.
Jolene x
Smokey Ceylon look wonderful with Adamantium which is a warm grey. These hearts are half Ceylon and half Adamantium separated with a twisted band of silvered ivory stringer.
Jolene x
Labels:
Adamantium,
Ceylon ltd run,
creation is messy,
Messy testing
02/03/2016
Messy testing - Experimental, Musk and Pistachio Ice Cream Ltd Runs
There are some new CiM ltd run colours on the horizon including a new formula for Clear called Experimental ltd run. I have made two similar sets of beads. The first uses Experimental for the encasing layer and the second uses Effetre 006 Clear.
To my eye Musk ltd run looks like a light version of Mojito so I decided to use them both side by side in the same set. This first set of beads has been made with thick cores of Musk ltd run (round beads) and thin cores of Mojito (tumble etched donuts). All were encased with Experimental. The rounds and donuts came out of the kiln looking much closer in hue than they do in rod form due to the relative thickness of the cores and thickness of the encasing layer on top. I have also used Mojito as the top layer on most of the stacked dots in this set as I felt that Musk might look too pale to have much impact when used in such a tiny amount over a coloured dot.
The
stringer work was done with Pistachio Ice Cream ltd run, which is a
really pretty very pale green opaque. It was much stiffer as a fine
stringer than that I expected it to be considering it is such a pale
opaque shade. I have also used a touch of Elphaba here and there to give the whole
colour scheme a little zingy lift.
The beads in my second set have a core of CiM Aegean ltd run encased with Effetre 006 and decorated with Effetre Lapis 421 and Effetre white.
Below are two close up images showing just one bead from each set side by side, 006 on the left and Experimental on the right. Both clear glasses look quite good in terms of minimal micro bubbles and scum. Experimental just has a slight edge over 006 Clear in terms of clarity when you hold the beads up to the light. I found that experimental was softer than 006 Clear which means that it can be used to make a thinner encasement layer than the stiffer 006 Clear can. All in all I quite like Experimental.
Jolene xx
To my eye Musk ltd run looks like a light version of Mojito so I decided to use them both side by side in the same set. This first set of beads has been made with thick cores of Musk ltd run (round beads) and thin cores of Mojito (tumble etched donuts). All were encased with Experimental. The rounds and donuts came out of the kiln looking much closer in hue than they do in rod form due to the relative thickness of the cores and thickness of the encasing layer on top. I have also used Mojito as the top layer on most of the stacked dots in this set as I felt that Musk might look too pale to have much impact when used in such a tiny amount over a coloured dot.
The
stringer work was done with Pistachio Ice Cream ltd run, which is a
really pretty very pale green opaque. It was much stiffer as a fine
stringer than that I expected it to be considering it is such a pale
opaque shade. I have also used a touch of Elphaba here and there to give the whole
colour scheme a little zingy lift.The beads in my second set have a core of CiM Aegean ltd run encased with Effetre 006 and decorated with Effetre Lapis 421 and Effetre white.
Below are two close up images showing just one bead from each set side by side, 006 on the left and Experimental on the right. Both clear glasses look quite good in terms of minimal micro bubbles and scum. Experimental just has a slight edge over 006 Clear in terms of clarity when you hold the beads up to the light. I found that experimental was softer than 006 Clear which means that it can be used to make a thinner encasement layer than the stiffer 006 Clear can. All in all I quite like Experimental.
Jolene xx
23/09/2015
Mandala beads and buttons
I'm so totally thrilled with this mornings kiln harvest. I've been wanting to try to make something like this for yonks but just didn't have enough skill and heat control to stop a large disc from just collapsing in on itself. These beads and buttons all turned out deliciously and I can't wait to get back into the studio to play with this style again.

Have a great day, Jolene xx
www.kitzbitz.com

Have a great day, Jolene xx
Subscribe to:
Posts (Atom)