I have recently brought a Zoozii's texture tool press. It's a pretty versatile piece of kit with a good range of shape plates and texture plates to choose from and to mix and match. This tutorial uses the Texture Tool base in conjunction with the Heart Shape Plate medium+ and Spiral Texture Plates. The screws supplied with the texture tool are long enough so that you can select a texture plate and shape plate and layer them up over your base and handle and secure them to create your own custom press.
In this tutorial there is also some some tips on how to use highlight
mica (pixie dust) for surface decoration. Above are a few
examples of what violet highlight mica looks like over some of my
favourite transparent CiM glass colours.
Pale transparent glass looks particularly effective with highlight mica. Adding a little mica as partial surface decoration to textured beads is a simple
and pretty way to add a little sparkle and pick out a little detail whilst being an efficient use of mica if
you have just a little sampler or baggie.
Step1 wrap your mandrel with several small wrap of your s=chosen glass and roll it out on a graphite paddle to a length just short of your heart cavity.
Step 2 measure your base bead against the press to check length. Heat and marver further is your bead is too short.
Step 3 add more glass to your base bead to form a conical shape.
Step 4 heat and press your cone into the heart cavity
Step 5 heat again an press the other side of your bead into the heart cavity.
Step 6 add 1 large dot of glass to each side of your bead to begin to form the lobes.
Step 7 heat and press both sides into your heart cavity and look to see how much more glass your need to add to the top and sides.
Step 8 swipe a small amount on the sides and top of your bead where required.
Step 9 heat and press both sides into your heart cavity and look again to see if any more glass is needed.
Step10 add small amounts of glass where needed, remember it is easier to add more glass than take away excess glass when working with a press. Adding small amounts at a time yields the best results.
Step 11 heat and press both sides into your heart cavity and look again to see if any more glass is needed. If so repeat steps 10 and 11 until you are happy with the fit.
Step 12 add a trio of small dots top to both flat sides. Place one dot on each lobe and one near the base of the heart. It will be this extra glass that fills the texture plate cavity when you come to press your bead. Heat your bead thoroughly and then press. Immediately after pressing waft your bead through the flame to put back some of the heat lost to the brass when the bead was pressed. If you are not adding further decoration place your bead directly into your warm kiln.
Step13 To add some sparkle heat your bead further until it is glowing but not yet hot enough to loose detail. The mica will only adhere to molten glass so you will need to work quickly. Dab one side of your bead onto a small amount of highlight mica which you have placed on a heat proof surface. Turn the bead and dab the other side. Return the bead to the top of the flame only and flame anneal thoroughly before placing your pressed bead in the kiln.
Using this kind of powdered surface decoration can be a little bit of a juggling act with pressed beads as your bead needs to be warmed thorough before garaging to avoid thermal cracking along the mandrel but also highlight mica is easy to burn off and looks really quite ugly when this happens. Working at the very top on the flame will stop the highlight mica form being burnt while you flame anneal your bead.
Please remember to use common sense and exercise caution when working with mica - wear a dust mask as you would when working with frit and enamels and work in an adequately ventilated space.
Have fun! Jolene x
Frit N Chips lampwork supplies and Kitzbitz Art Beads
25/09/2012
21/09/2012
La Patisserie Press III - flowers and diamonds
Today I am going to show you two more step by step tutorials for my beloved Kati was here! Patissierie Press. This post is for the two most complicated chocolate shapes, the first is for the flower cavity and the second is for the diamond shape that I can't help but think of as "vanilla fudge".
This is what the flower cavity looks like, symmetrical across the mandrel line but asymmetric hole to hole. For a little while this shape has presented me with a little bit of a challenge but now I finally have a consistant working process that I'm happy to share.
Step 1 add a row of small wraps of glass to your mandrel and roll it out on your marver at an angle until you have a cone shape long enough to fill the full length of the flower cavity.
Step 2 press your cone into the flower cavity (I like to use the handle side only at this point so that I can work at eye level) to leave indents where the internal points of the flower meet your core bead.
Step 3 add four small dots of glass between the indents to start building your petal shapes
Step 3 warm your beads and press inside the flower cavity on the handle side of your press. turn the bead over and press the other side.
Step 5 Start to give your flower form some depth by putting five small dots on top of your petals, turn the bead over and place five more dots on the petals on the other side.
Step 6 warm your bead thoroughly and press in the flower cavity on your handle, turn the bead and press again. Repeat steps 3 through to 6 as many times as you need to, adding small amounts of glass each time until you are happy with your flower form.
Step 7 add small dots of glass to the centre of your flower shape on both sides.
Step 7 warm your bead thoroughly and press in the flower cavity in the handle, turn the bead and press the other side.
Step 8 add a generous dollop of glass top and bottom of your flower bead.
Step 9 heat your bead through and place your bead in the base and press between both halves of the press. This will smooth the shape and push glass down onto the texture plate to give you the waves on the bottom.
Next decorate your choc with murrini, stringers, textures and other fun stuff to make it look extra yummy!
If you take more care in the initial length of your footprint than I have here (mine was about 1/2mm too long) there will not be any overspill on to your mandrel through the pressing process. This bead will need to be cold worked with a diamond coated bit once properly annealed to remove the tiny amount of excess glass between its bottom petals.
I have also been having quite a bit of fun with this shape by treating it like a murrini making mold - the smiley face on my Pumpkin Murrini was form by half filling the flower cavity with black glass. This gorgeous orange colour is CiM Creamsicle which is one of my all time favourite glass colours.
Next I'd like to show you the vanilla fudge (diamond) form. I have found this shape the most difficult to get to grips with despite the fact that at first glance it looks to be quite a simple form without curves or ridges to consider. I have found that it is a rather round about and counter intuitive route that I have needed to take to get consistently crisp looking lines and smooth and uniform bead holes.
Step 1 add a row of small wraps of glass to your mandrel and roll it out on your marver until you have a tube shape long enough to fill the full length of the diamond cavity. In cross section it will look like a rectangle with corners that stick out beyond the cavity shape.
Step 2 super heat the tube until the whole core is liquid and shrinks back in to a rugby ball form. Keep the bead turning to keep the glass centred and even.
Step 3 Allow the bead to cool slightly and then press in to the diamond cavity in handle part of the press. Turn the bead over and press the other side.
Step 4 add two dots top and bottom of the bead fairly near where the bead footprint tapers off on the mandrel.
Step 5 heat the dots on and press the bead again in the diamond cavity in the handle, turn the bead and press again on the other side.
Step 5 repeat step 4 add two dots top and bottom of the bead fairly near where the bead footprint tapers off on the mandrel. The idea is that I am adding glass specifically corners little by little and building up the form gradually.
Step 7 repeat step 5 heat the dots on and press the bead again in the diamond cavity in the handle, turn the bead and press again on the other side.
Keep going with adding tiny dots at the corners and pressing in the diamond cavity until you have neat filled in corners and smooth well formed bead holes that are no longer tapered or sharp.
Step 8 add a generous dollop of glass top and bottom of your flower bead.
Step 9 heat your bead through and place it in the base and press between both halves of the press. This will smooth the shape and push glass down onto the texture plate to give you the waves on the bottom.
This delicious looking toasted caramel/toffee/boiled sugar sweet treat looking glass is CiM Ghee and I will be doing a whole blog post dedicated to this glass and how well it lends itself to confectionery beads in the near future.
I hope that my trio of short tutorials with the Kati was here! La Patisserie Press have helped to inspire. You can view the full list of tutorials that I have published on my blog here.
Have fun! Jolene x
Frit N Chips lampwork supplies and Kitzbitz Art Beads
This is what the flower cavity looks like, symmetrical across the mandrel line but asymmetric hole to hole. For a little while this shape has presented me with a little bit of a challenge but now I finally have a consistant working process that I'm happy to share.
Step 1 add a row of small wraps of glass to your mandrel and roll it out on your marver at an angle until you have a cone shape long enough to fill the full length of the flower cavity.
Step 2 press your cone into the flower cavity (I like to use the handle side only at this point so that I can work at eye level) to leave indents where the internal points of the flower meet your core bead.
Step 3 add four small dots of glass between the indents to start building your petal shapes
Step 3 warm your beads and press inside the flower cavity on the handle side of your press. turn the bead over and press the other side.
Step 5 Start to give your flower form some depth by putting five small dots on top of your petals, turn the bead over and place five more dots on the petals on the other side.
Step 6 warm your bead thoroughly and press in the flower cavity on your handle, turn the bead and press again. Repeat steps 3 through to 6 as many times as you need to, adding small amounts of glass each time until you are happy with your flower form.
Step 7 add small dots of glass to the centre of your flower shape on both sides.
Step 7 warm your bead thoroughly and press in the flower cavity in the handle, turn the bead and press the other side.
Step 8 add a generous dollop of glass top and bottom of your flower bead.
Step 9 heat your bead through and place your bead in the base and press between both halves of the press. This will smooth the shape and push glass down onto the texture plate to give you the waves on the bottom.
Next decorate your choc with murrini, stringers, textures and other fun stuff to make it look extra yummy!
If you take more care in the initial length of your footprint than I have here (mine was about 1/2mm too long) there will not be any overspill on to your mandrel through the pressing process. This bead will need to be cold worked with a diamond coated bit once properly annealed to remove the tiny amount of excess glass between its bottom petals.
Next I'd like to show you the vanilla fudge (diamond) form. I have found this shape the most difficult to get to grips with despite the fact that at first glance it looks to be quite a simple form without curves or ridges to consider. I have found that it is a rather round about and counter intuitive route that I have needed to take to get consistently crisp looking lines and smooth and uniform bead holes.
Step 1 add a row of small wraps of glass to your mandrel and roll it out on your marver until you have a tube shape long enough to fill the full length of the diamond cavity. In cross section it will look like a rectangle with corners that stick out beyond the cavity shape.
Step 2 super heat the tube until the whole core is liquid and shrinks back in to a rugby ball form. Keep the bead turning to keep the glass centred and even.
Step 3 Allow the bead to cool slightly and then press in to the diamond cavity in handle part of the press. Turn the bead over and press the other side.
Step 4 add two dots top and bottom of the bead fairly near where the bead footprint tapers off on the mandrel.
Step 5 heat the dots on and press the bead again in the diamond cavity in the handle, turn the bead and press again on the other side.
Step 5 repeat step 4 add two dots top and bottom of the bead fairly near where the bead footprint tapers off on the mandrel. The idea is that I am adding glass specifically corners little by little and building up the form gradually.
Step 7 repeat step 5 heat the dots on and press the bead again in the diamond cavity in the handle, turn the bead and press again on the other side.
Keep going with adding tiny dots at the corners and pressing in the diamond cavity until you have neat filled in corners and smooth well formed bead holes that are no longer tapered or sharp.
Step 8 add a generous dollop of glass top and bottom of your flower bead.
Step 9 heat your bead through and place it in the base and press between both halves of the press. This will smooth the shape and push glass down onto the texture plate to give you the waves on the bottom.
This delicious looking toasted caramel/toffee/boiled sugar sweet treat looking glass is CiM Ghee and I will be doing a whole blog post dedicated to this glass and how well it lends itself to confectionery beads in the near future.
I hope that my trio of short tutorials with the Kati was here! La Patisserie Press have helped to inspire. You can view the full list of tutorials that I have published on my blog here.
Have fun! Jolene x
Frit N Chips lampwork supplies and Kitzbitz Art Beads
Labels:
la patisserie press,
lampwork tutorial
10/09/2012
La Patisserie Press II - Creme Caramels
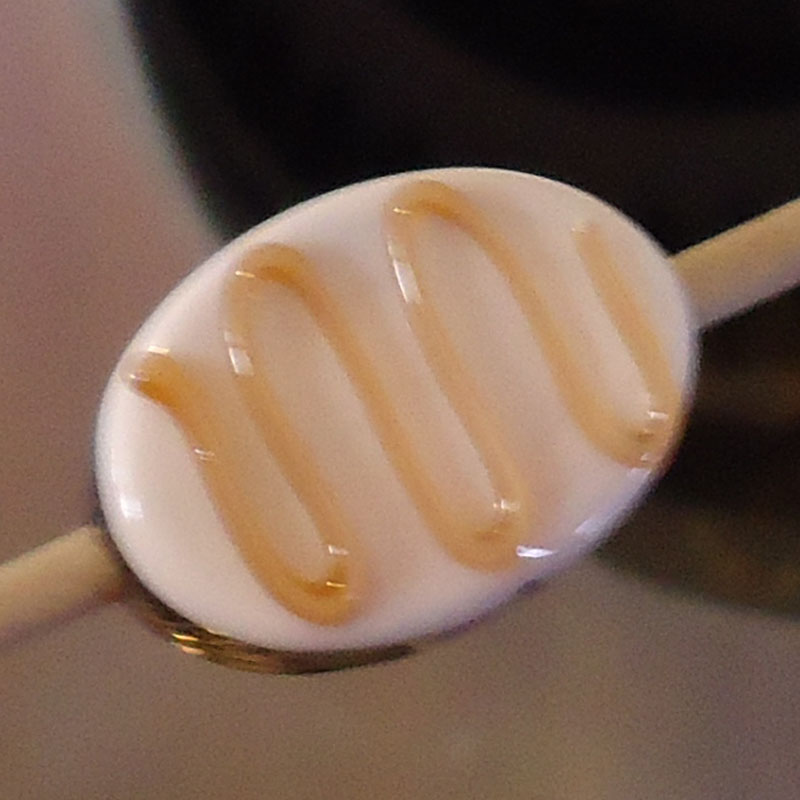
Today I'd like to show you how I have been making little iced oval chocolates with icing and Caramel drizzle with my new La Patisserie Press (which I love!)
Step 1 add a row of small wraps of glass to your mandrel and roll it out on your marver until you have a tube shape long enough to fill the full length of the oval cavity. In cross section it will look like a rectangle with corners that stick out beyond the oval shape.
Press your tube, turn, press again, turn, press again until the corners of your tube have been rounded off.
Step 2 add more wraps of glass to just the centre section of your bead
Step 3 press gently in to the top part of the press (the part with the handle) then flip it over and press again, add small dabs of glass where needed and press again until the shape is filled
Step 4 take a contrasting 2 or 3 mm stringer and draw and outline around the edge of the top side of your bead.
Step 5 fill in your outline with swipes of the same stringer
Step 6 heat your bead through and place your bead in the base and press between both halves of the press. This will smooth the shape and push glass down onto the texture plate to give you the waves on the bottom
Step 7 flame polish the top surface of your bead ready for decoration
Step 8 the stringer I am using for the caramel sauce is an encased stringer of CiM Peace encased with Effetre medium Topaz transparent 016. It is a good idea to prepare several stringers in advance. Apply your stringer in one continuous smooth trail back and forth across your bead
Step 9 heat the surface of your bead until just soft and rake about 1/3 of the way down your bead with a fine clear stringer (or fine stringer that matches your icing) to drag you caramel sauce
Step 10 heat the surface of your bead again until the surface is just soft and rake a line 2/3 of the way down in the opposite direction to finish the look. Warm your bead through thoroughly and place in your kiln to anneal.
Variations on a theme - why not ice white choc beads with dark chocolate and strawberry sauce or go minty instead? Try raking lines across the width of your bead rather than lengthways for a totally different look.
Have fun! Jolene x
Frit N Chips lampwork supplies and Kitzbitz Art Beads
Step 1 add a row of small wraps of glass to your mandrel and roll it out on your marver until you have a tube shape long enough to fill the full length of the oval cavity. In cross section it will look like a rectangle with corners that stick out beyond the oval shape.
Press your tube, turn, press again, turn, press again until the corners of your tube have been rounded off.
Step 2 add more wraps of glass to just the centre section of your bead
Step 3 press gently in to the top part of the press (the part with the handle) then flip it over and press again, add small dabs of glass where needed and press again until the shape is filled
Step 4 take a contrasting 2 or 3 mm stringer and draw and outline around the edge of the top side of your bead.
Step 5 fill in your outline with swipes of the same stringer
Step 6 heat your bead through and place your bead in the base and press between both halves of the press. This will smooth the shape and push glass down onto the texture plate to give you the waves on the bottom
Step 7 flame polish the top surface of your bead ready for decoration
Step 8 the stringer I am using for the caramel sauce is an encased stringer of CiM Peace encased with Effetre medium Topaz transparent 016. It is a good idea to prepare several stringers in advance. Apply your stringer in one continuous smooth trail back and forth across your bead
Step 9 heat the surface of your bead until just soft and rake about 1/3 of the way down your bead with a fine clear stringer (or fine stringer that matches your icing) to drag you caramel sauce
Step 10 heat the surface of your bead again until the surface is just soft and rake a line 2/3 of the way down in the opposite direction to finish the look. Warm your bead through thoroughly and place in your kiln to anneal.
Variations on a theme - why not ice white choc beads with dark chocolate and strawberry sauce or go minty instead? Try raking lines across the width of your bead rather than lengthways for a totally different look.
Have fun! Jolene x
Frit N Chips lampwork supplies and Kitzbitz Art Beads
Labels:
la patisserie press,
lampwork tutorial
09/09/2012
Visual taste test - White Chocolate!
I am completely smitten with my new press, La Patisserie by Kati was here! so yesterday I grabbed a rod each of all of the likely suspects and made some White Chocolate beads..........
My preconception when selecting rods was that my favourite white chocolate colour would be D followed by C then F. It turned out that F was my hands down favourite but I had this niggling feeling that although it looked pretty it was nowhere near the most realistic shade of the 6.
I decided to get some other opinions so I put this image up on Craft Pimp Forum and on my Facebook Page this morning and asked the girls and boys over there for feedback on most yummy looking/most like white chocolate. I collated the results after 12 hours of canvasing for opinions and scored the feedback.
If someone chose a single clear favourite then I awarded that bead 3 points. If more than one bead was selected then I awarded points on a sliding scale as follows -
Prefers X then Y, X gets 2 points, Y gets 1 point.
Likes X and Y (and Z...), 1 points each.
Thinks X or Y (or Z) is good then 1 points each.
The Glass!
What this little experiment tells me is that I have 3 excellent options to choose from when I want to make yummy looking white choc beads - Vetrofond Belgian Lace for plain and textured chocs, CiM Linen which is much darker in tone than Belgian Lace holds up well to being "Iced" and Effetre Dark Ivory as a good all rounder option.
Thank you to everyone who played along and shared their opinions today.
Jolene x
Frit N Chips lampwork supplies and Kitzbitz Art Beads
My preconception when selecting rods was that my favourite white chocolate colour would be D followed by C then F. It turned out that F was my hands down favourite but I had this niggling feeling that although it looked pretty it was nowhere near the most realistic shade of the 6.
I decided to get some other opinions so I put this image up on Craft Pimp Forum and on my Facebook Page this morning and asked the girls and boys over there for feedback on most yummy looking/most like white chocolate. I collated the results after 12 hours of canvasing for opinions and scored the feedback.
If someone chose a single clear favourite then I awarded that bead 3 points. If more than one bead was selected then I awarded points on a sliding scale as follows -
Prefers X then Y, X gets 2 points, Y gets 1 point.
Likes X and Y (and Z...), 1 points each.
Thinks X or Y (or Z) is good then 1 points each.
The Glass!
- A Reichenbach 104 Porcelain
- B Vetrofond Dark Ivory 262
- C Effetre Dark Ivory 276
- D CiM Linen
- E Vetrofond Honey Crunch 540
- F Vetrofond Belgian Lace/Yellow Ice 947
What this little experiment tells me is that I have 3 excellent options to choose from when I want to make yummy looking white choc beads - Vetrofond Belgian Lace for plain and textured chocs, CiM Linen which is much darker in tone than Belgian Lace holds up well to being "Iced" and Effetre Dark Ivory as a good all rounder option.
Thank you to everyone who played along and shared their opinions today.
Jolene x
Frit N Chips lampwork supplies and Kitzbitz Art Beads
Subscribe to:
Posts (Atom)