Etsy

22/12/2010

FIMO Classic Colour Mixing Resource

I just found this on the STAEDTLER FIMO website and it is too useful to keep to myself so thought I would post up a quick link here on my blog. Click the image to go to the webpage where you can download this colour mixing chart pdf.

FIMO Classic Colour Mixing Resource

Jolene x

Glitter on New Years Eve

Glitter on New Years Eve by Aimee.

It was lovely to log in to Etsy today and see a message there to let me know my work had been featured. It is such a thrill when that happens. A big thank you to Aimee of Aimees Rock Works for putting my Sleeping Beauty beads in her glittery, girly, magpie’s dream of a gallery.


Aimee's shop is a Mecca for those of us who love rocks. She has a degree in Geological Sciences and a wonderful knack of creating quirky objects from the innocent pebble that are both useful and that will make you smile like these lovely beach pebble place card holders. She also uses rocks to create door knobs, curtain hooks and bottle openers which make excellent man gifts!

A fun mix of naturally formed beach rocks set with aluminum wire place card holders

Beach Rock and Wire Place Card Holders

Jolene
Kitzbitz

21/12/2010

My first FIMO beads

FIMO beads with flower and leaf cane
Here are my first beads with polymer clay, I am pleased with them, they are very flawed but also very pretty.
 
I threw myself in at the deep end, picking a truck load of tricky techniques for my first time out because I love making murrini beads with glass - so it is only natural to want to go to that idea first with a new medium.

I am going to break down for this blog post all the things that I found tricky, what went wrong, what further research I have done and how to best avoid similar problems in the future.

  1. Slicing Cane - The images on my flower canes were getting squashed and distorted as I cut slices. I made them from FIMO soft which I found out later was not an ideal clay for picture cane. I found a great article which said to put your canes in the fridge or even your freezer before slicing and also to rotate your cane slightly before each cut. I have also been using an ordinary craft blade and a thinner sharper blade such as a tissue blade would give less distortion.
  2. Equal Sizing - I rolled a ball of FIMO and sliced it in half, then sliced each half in two again and so on until I had 8 pieces. When I rolled these pieces in to balls they varied in proportion much more than I thought they would. A better method would have been to roll the base clay in it a tube of the desired diameter of your finished bead size and then to measure and cut off at lengths of the desired diameter to make your blanks.
  3. Scale - I made base beads the size I had wanted for my finished bead not taking in to account that I would be adding significantly more clay with my cane decoration - my finished beads were all huge (20-25mm in diameter). Cutting thinner slices of cane to apply would help me maintain scale along with starting with a smaller blank.
  4. Discoloration Whilst Cooking - I found that the transparent FIMO was starting to “toast” on the top – I am using a mini oven which radiates heat down from a filament at the top. I think that this may mean that my oven is too hot or having temperature spikes so I need to get my hands on a thermometer to check out exactly what is going on there. Top tips that I have found for another time are to protect the clay from radiant heat with a parchment tent or to immerse my work in cornflower before baking – a technique used by doll makers in particular. I also found out that some white and translucent clay are prone to a bit of yellowing upon baking and so I will need to experiment a bit.
  5. Translucent does not mean Transparent – With a background in crafting with glass – I read translucent and imagined transparent. Not so! The slices of cane that I cut were way too thick so once baked it is possible to see the impression of colour underneath but none of the actual detail of jelly roll cane or leaf cane.
  6. Painting on Glaze – I used Sculpy sating glaze on these beads, applied quite thickly with a thin soft brush. It worked quite well but there are lines where I apply the glaze evenly enough and it was too viscose to *smooth out* by itself before setting. It is possible to lightly sand and buff polymer clay to a gloss by hand – this will help too in removing some of the tell tale fingerprints marks in the clay which are a dead giveaway sign that I am a PC newbie.
    FIMO beads with flower and leaf cane

    Many thanks to Cindy Lietz and Sue Heaser for publishing the invaluble articles on line for the newbiw PC crafter that I have linked to from this post.

    Jolene x
    Kitzbitz

    12/12/2010

    My first FIMO flower canes

    It is too cold to venture out in to my unheated studio in the evenings at the moment and my hands are too full during the day with my beautiful 2 year old daughter and gorgeous newborn baby boy.... in a way I have been going a little stir crazy lately without my usual creative outlet at my finger tips.

    I saw a second hand starter set  for polymer clay advertised and thought I would give it a whirl, head filled with fanciful ideas of miniature food and kitsch earrings.

    Flower Cane
    It turns out that what I love about glass, making canes and intricate preparatory work, is absolutely mirrored in the skill set for working with clay - only it is possible to create much more intricate detail.

    I have been searching around on the web this for resources and free tutorials and have found a lot of great information. Anyway enough chattering on - here are my first ever polymer clay canes, based loosely on (but nothing near as good as) free tutorials on flickr.
    Slices of rose cane


    My 5 petal flower cane uses ideas about cutting and fusing for repetition of fine detail that I saw in this fabulous tutorial by ayeletbeads

    My rose cane is a much simplified version of the 3D rose cane that I saw created in this wonderful tutorial by Sigal Simovitch

    They are by no means perfect, but I am so happy with them as first attempts with a new medium.

    Jolene x
    Kitzbitz

    09/12/2010

    Terracotta button necklace

    Just a quickie post to show off this beautiful necklace featuring a stunning terracotta flower button by Tan Gray of tanofcourse with a gorgeous hand dyed silk ribbon by Diane Turton
    sowzeredesigns - I think they are utterly gorgeous together.


    Jolene x
    Kitzbitz

    07/12/2010

    Phoenix, Ginger, Copper, Silk and Terracotta

    These pictures show simple spacers made from Phoenix, some I have struck and some I have left unstruck for comparison. For the beads that I struck, I allowed them to cool outside of the flame until they lost their glow and introduced them to the top flame again to bathe them in gentle heat. The colour of the struck beads is a rich soft orange opaque which was easy to achieve with a single strike. I am intrigued by the large variation in colour that can be seen in these images though comparing the struck and un-struck beads. I think that Phoenix would be an exciting glass to use for sculptural creations.


    I made these sweet and simple little spacer beads from CiM Ginger. One of the larger beads has dots of silvered ivory stringer (sis) too. The fine silver leaf used to create the organic patterns and striations in the Effetre ivory stringer have not fumed or reacted with the base of Ginger at all which tells me that it would be a great glass to use if you were looking for a light and neutral non reactive base glass for your bead design.

    This lovely necklace uses both struck and unstruck Phoenix with Ginger spacers to show a progression in both colour and tone. I have etched the surface of my spacers to compliment the wonderful hand crafted terracotta feature button by Tan Grey of tanofcourse. The bead and button elements have been tied together with a sumptuous sugar pink hand dyed silk ribbon by Diane Turton of SowZerE Designs. This necklace is a gift for a good mate of mine for Christmas, hope she likes it.


    The last of my Ginger, Phoenix and terracotta Tan button creations is this bracelet in three parts. The gorgeous copper toggle and findings were made by George Harper who kindly put an all copper bracelet findings kit together for me.
    I had never tried chain maille techniques before and so spent an informative afternoon browsing the fantastic M.A.I.L. (maille artisans international league) database for inspiration.


    Jolene
    Kitzbitz

    Pretty Poi and little sis

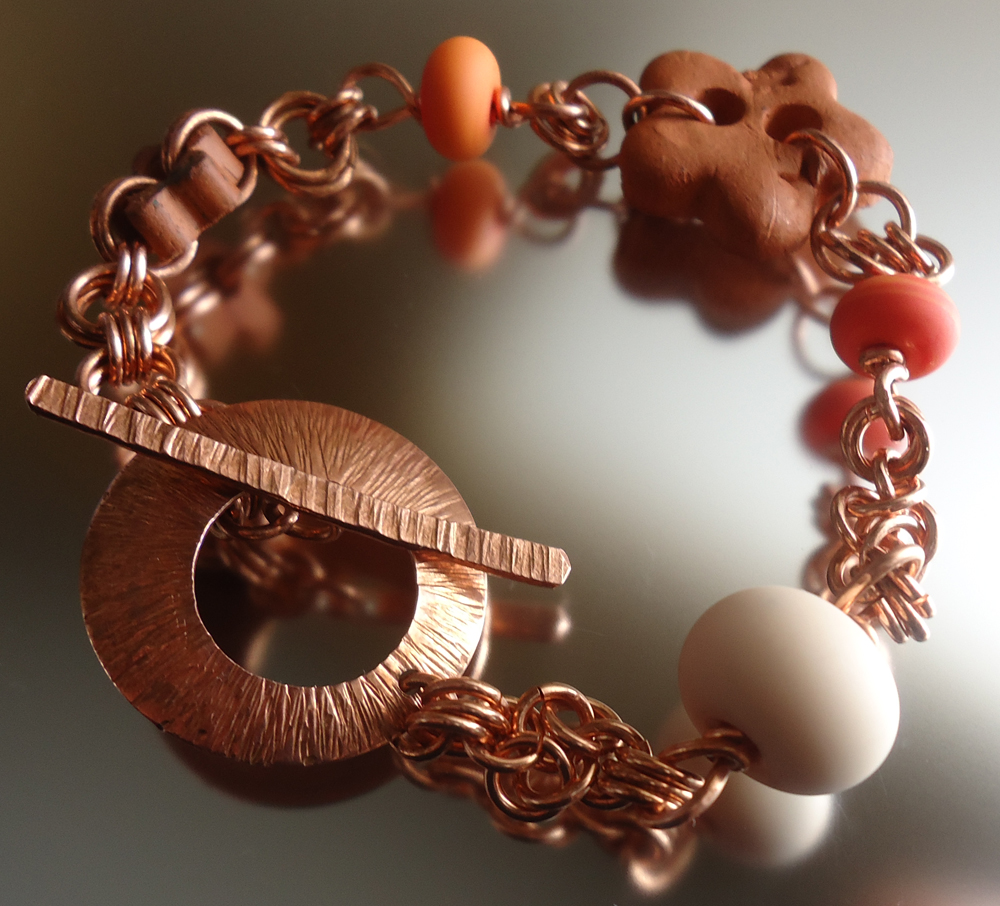
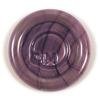
    Poi is a beautiful muted dark lilac. Either which way, this colour is lush.

    My Poi test beads are made with silvered ivory stringer which is a widely used effect in lampwork bead making. Every lampworker has their own favourite recipe for making sis - mine is Effetre light ivory with silver leaf (as opposed to dark ivory with silver foil) the organic effects are quite subtle with this combination of metal and glass.

    This bicone is made from Poi with Plum (opal) at its ends. The light spacers at the front are also Poi (worked quickly in the flame and without any fuming effects from the sis) the dark spacers behind are Evil Queen. It is nice to see a few of the CiM Purples together in one image, it shows how well all of these glasses work together.


    These two diddy cone beads are just made from Poi and sis. You can clearly see in the pic some effects of silver fuming on Poi. The bead on the left shows a reaction line between the sis and Poi The bead on the right (made with stringer saturated with a greater amount of fine silver) shows that the whole face of the bead has been fumed and have a darker caramelised look.


    My first necklace shows how soft and beautifully complimentary that Evil Queen, Poi and Ginger look when they have been acid etched. In the second necklace I have framed my Poi, Plum and sis bicone with some sunbaked beads by Julie Fountain of Lush Lampwork. In my third necklace I have left my Poi cone bead unetched as I really am a fan of that heavily fumed effect on this bead. All three of my necklaces feature hand crafted Sterling silver swan claps by George Harper of designed by george and very special silk ribbons, hand dyed in small batches by Diane Turton of SowZerE designs.

    Jolene x
    Kitzbitz

    05/12/2010

    A Blue and Siver Collection

    A blue and silver collection by Michelle Madonna.

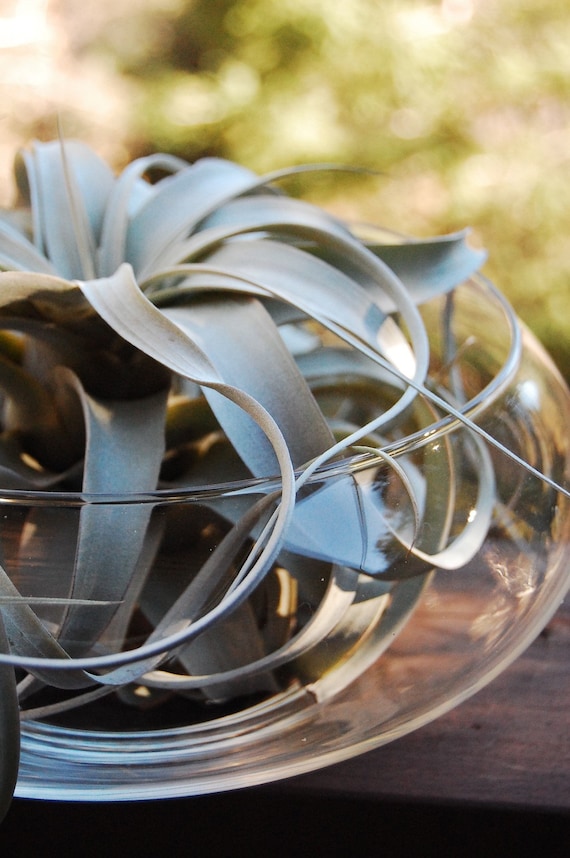
    I have been working very hard to improve my photography and product presentation over the last few months and it is such a lovely treat to find yourself (or rather, your work) chosen and featured in an Etsy treasury by a fellow Etsian. A big thank you to Michelle Madonna of plantology for putting my seaglass beads front and center in her beautiful treasury.

    Michelle's shop is jam packed full of incredibly beautiful images of her eco-chic plant arrangements. Here is a little teaser of what plantology has to offer.

    Totally ZEN! Gorgeous Xerographica air plant in glass bowl, with coarse and beautiful grayish color leaves, all curly and curvy.

    Zen Xerographica Arrangement In Glass Bowl

    Jolene
    Kitzbitz

    04/12/2010

    Soylent powder beads

    I really like Soylent, it melts smoothly and has the most wonderful dark striations, much like a grass green version of the effect that you get from Effetre dark ivory. I found that Soylent is happy to be worked in quite a hot flame without shocking, devitting or pitting. It is a wonderfully unfussy glass. Soylent makes a nice dark base for enamels and furnace glass powders to sit on top of.


    Jolene x
    Kitzbitz